Checkout Template
In this Article:
1: Download Template
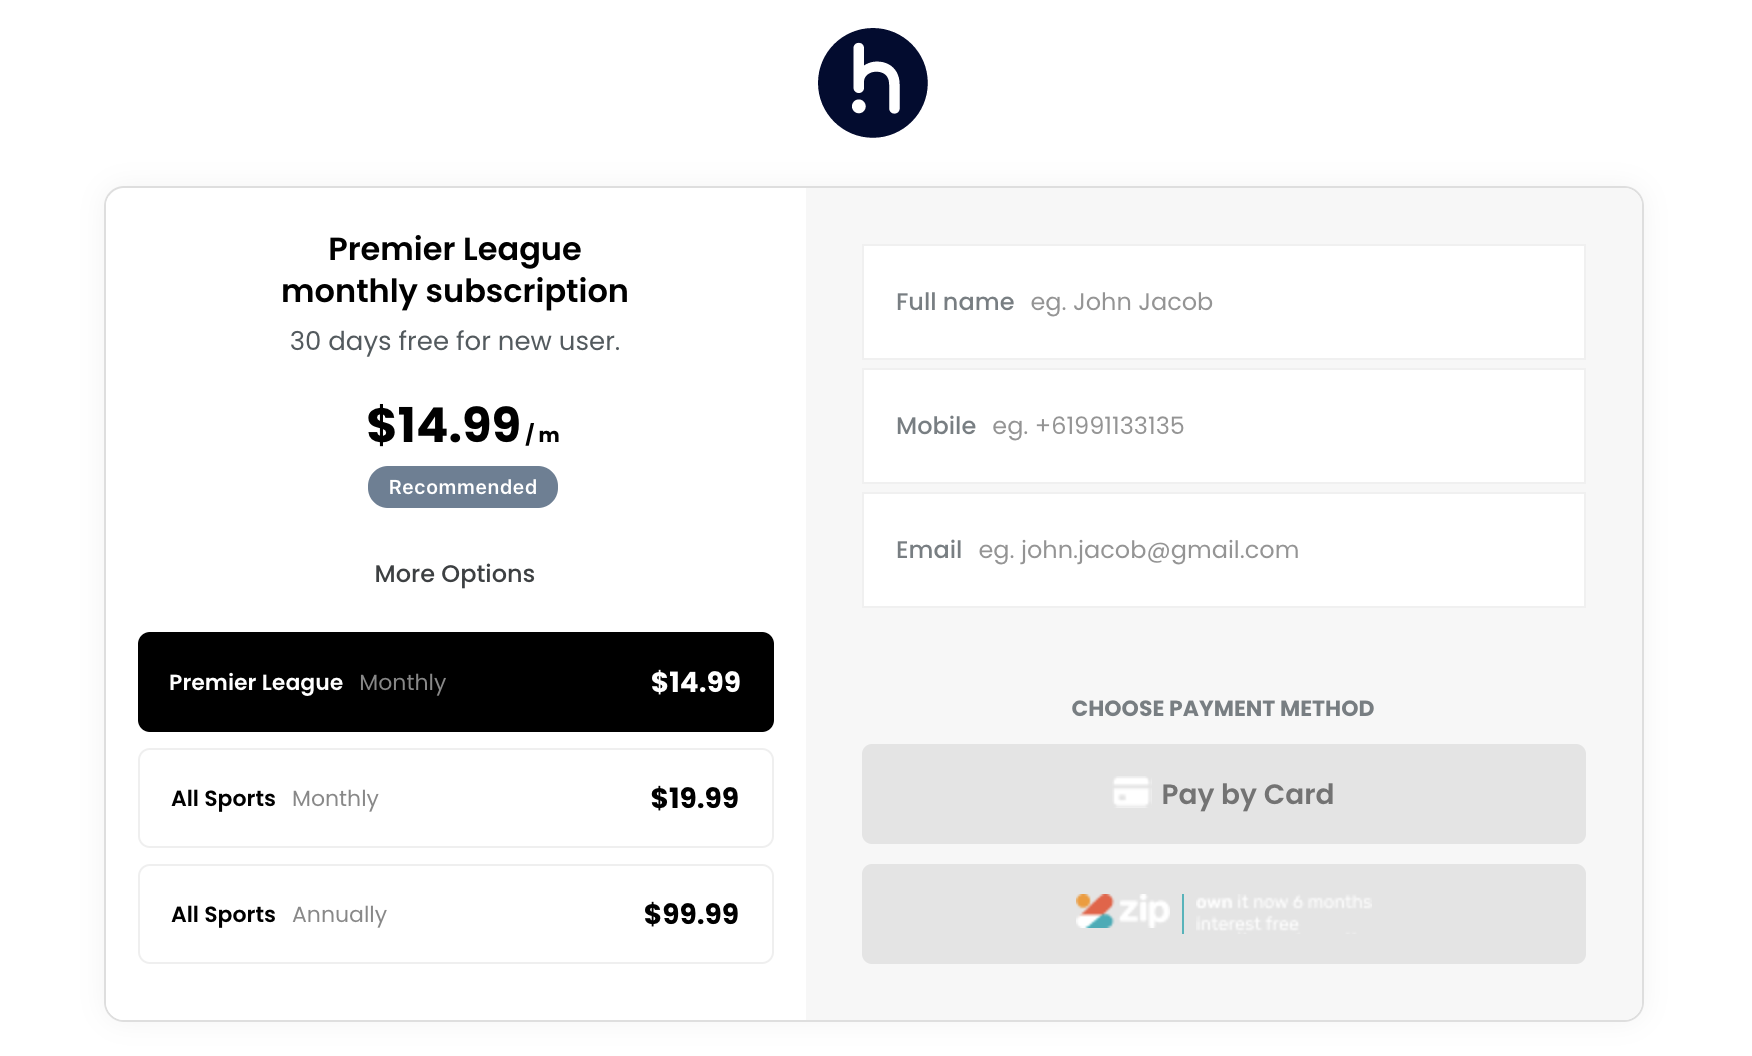
Download our Checkout template (React app) and customise it for your usecase.
Navigate to
src > pages > Checkoutfolder
2: Update your logo
2.1: Desktop Logo
- Edit
src/pages/Checkout/index.jsfile by updating the DesktopLogo component or point it to a png/jpg source, similar to the mobile logo implementation.
![]()
2.2: Mobile Logo
- Edit
src/pages/Checkout/index.jsfile by updating the MobileLogo source or implement an svg component similar to desktop logo implementation.
![]()
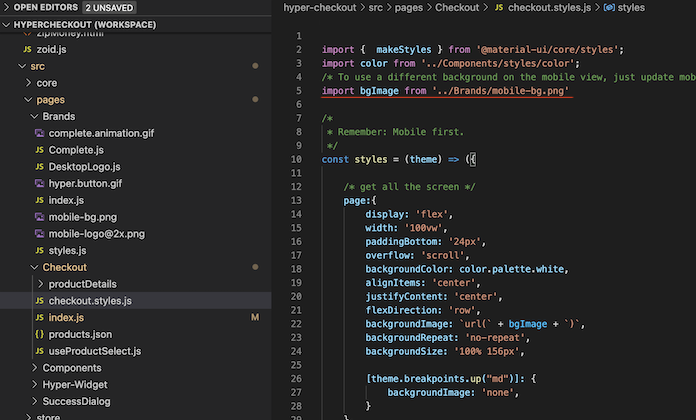
2.3: Mobile Background
- Edit
src/pages/Checkout/checkout.styles.jsfile by updating “bgImage” source, currently pointing at “../Brands/mobile-bg.png”.
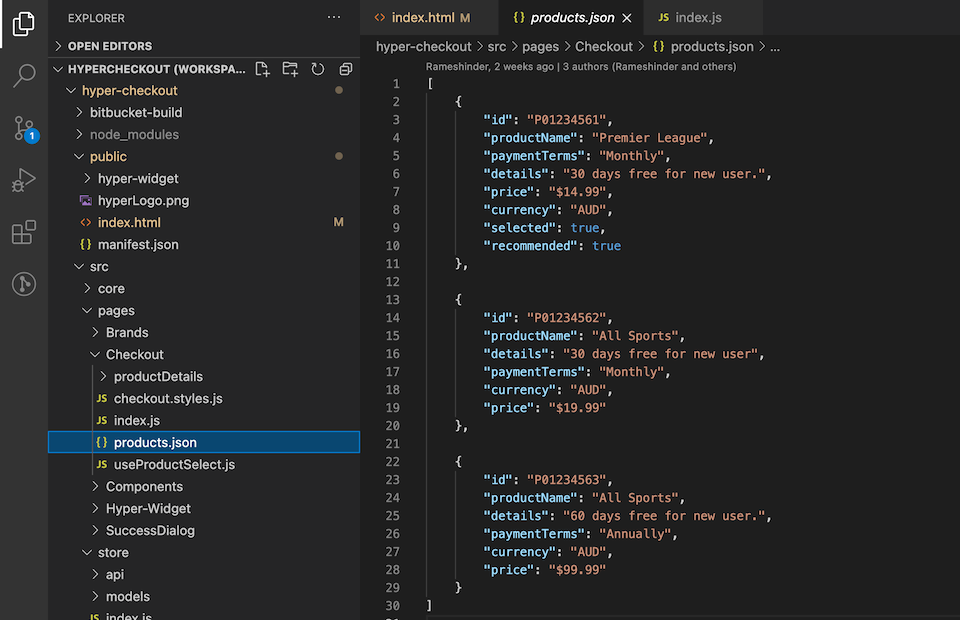
3: Update your products
- Edit
products.jsonfile:
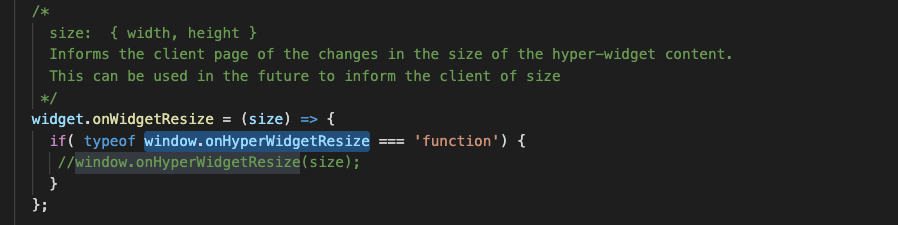
4: Resizing of hyper-widget
- Edit
index.htmlfile and modifywindow.onHyperWidgetResizehandler and modifywindow.onWidgetResizehandler that informs the client page of the changes in the size of the hyper-widget content usingwidget.onWidgetResizemethod.
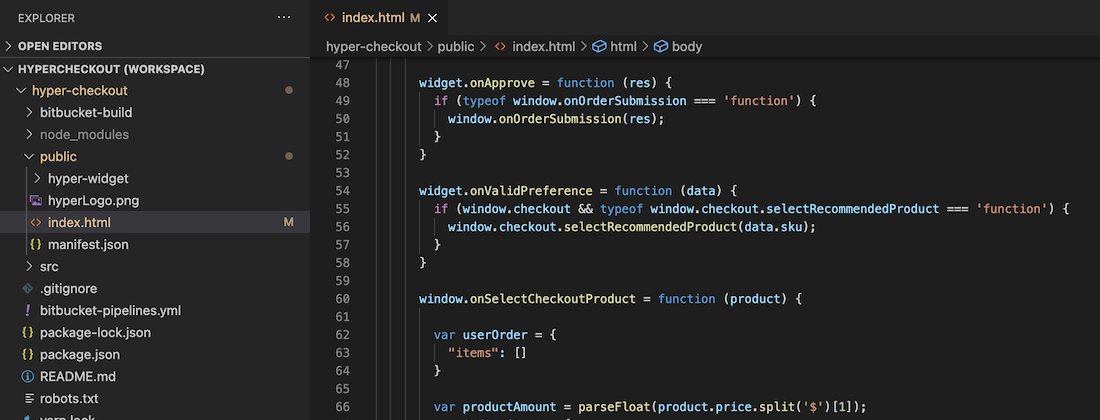
5: Handling Valid Preference and Selecting Product
- Edit
index.htmlfile and modifywidget.onValidPreferencehandler, passdata.skuonwindow.checkout.selectRecommendedProductfunction.
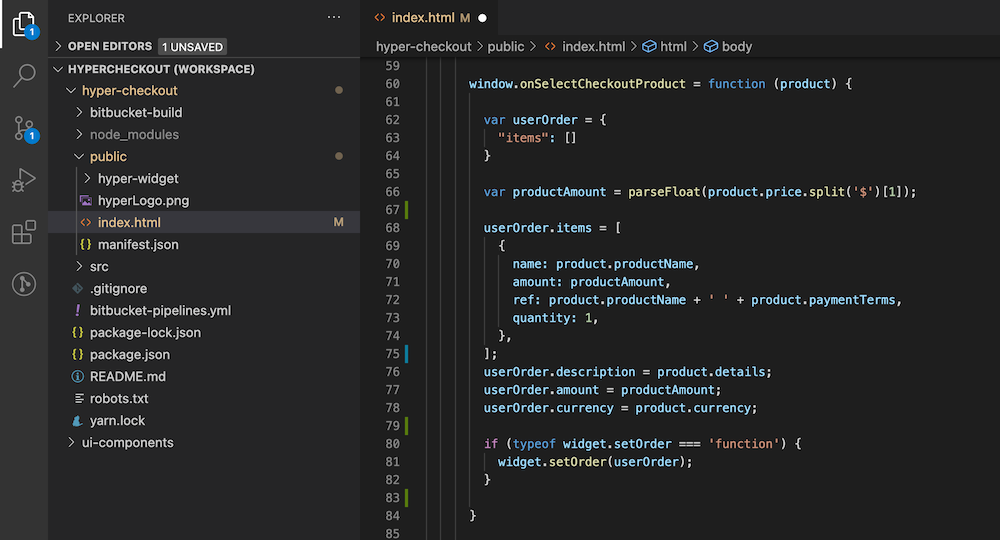
6: Handling Product Selection and Setting Widget Order
- Edit
index.htmlfile and modifywindow.onSelectCheckoutProducthandler, capture and process the product information and update the widget order usingwidget.setOrdermethod.
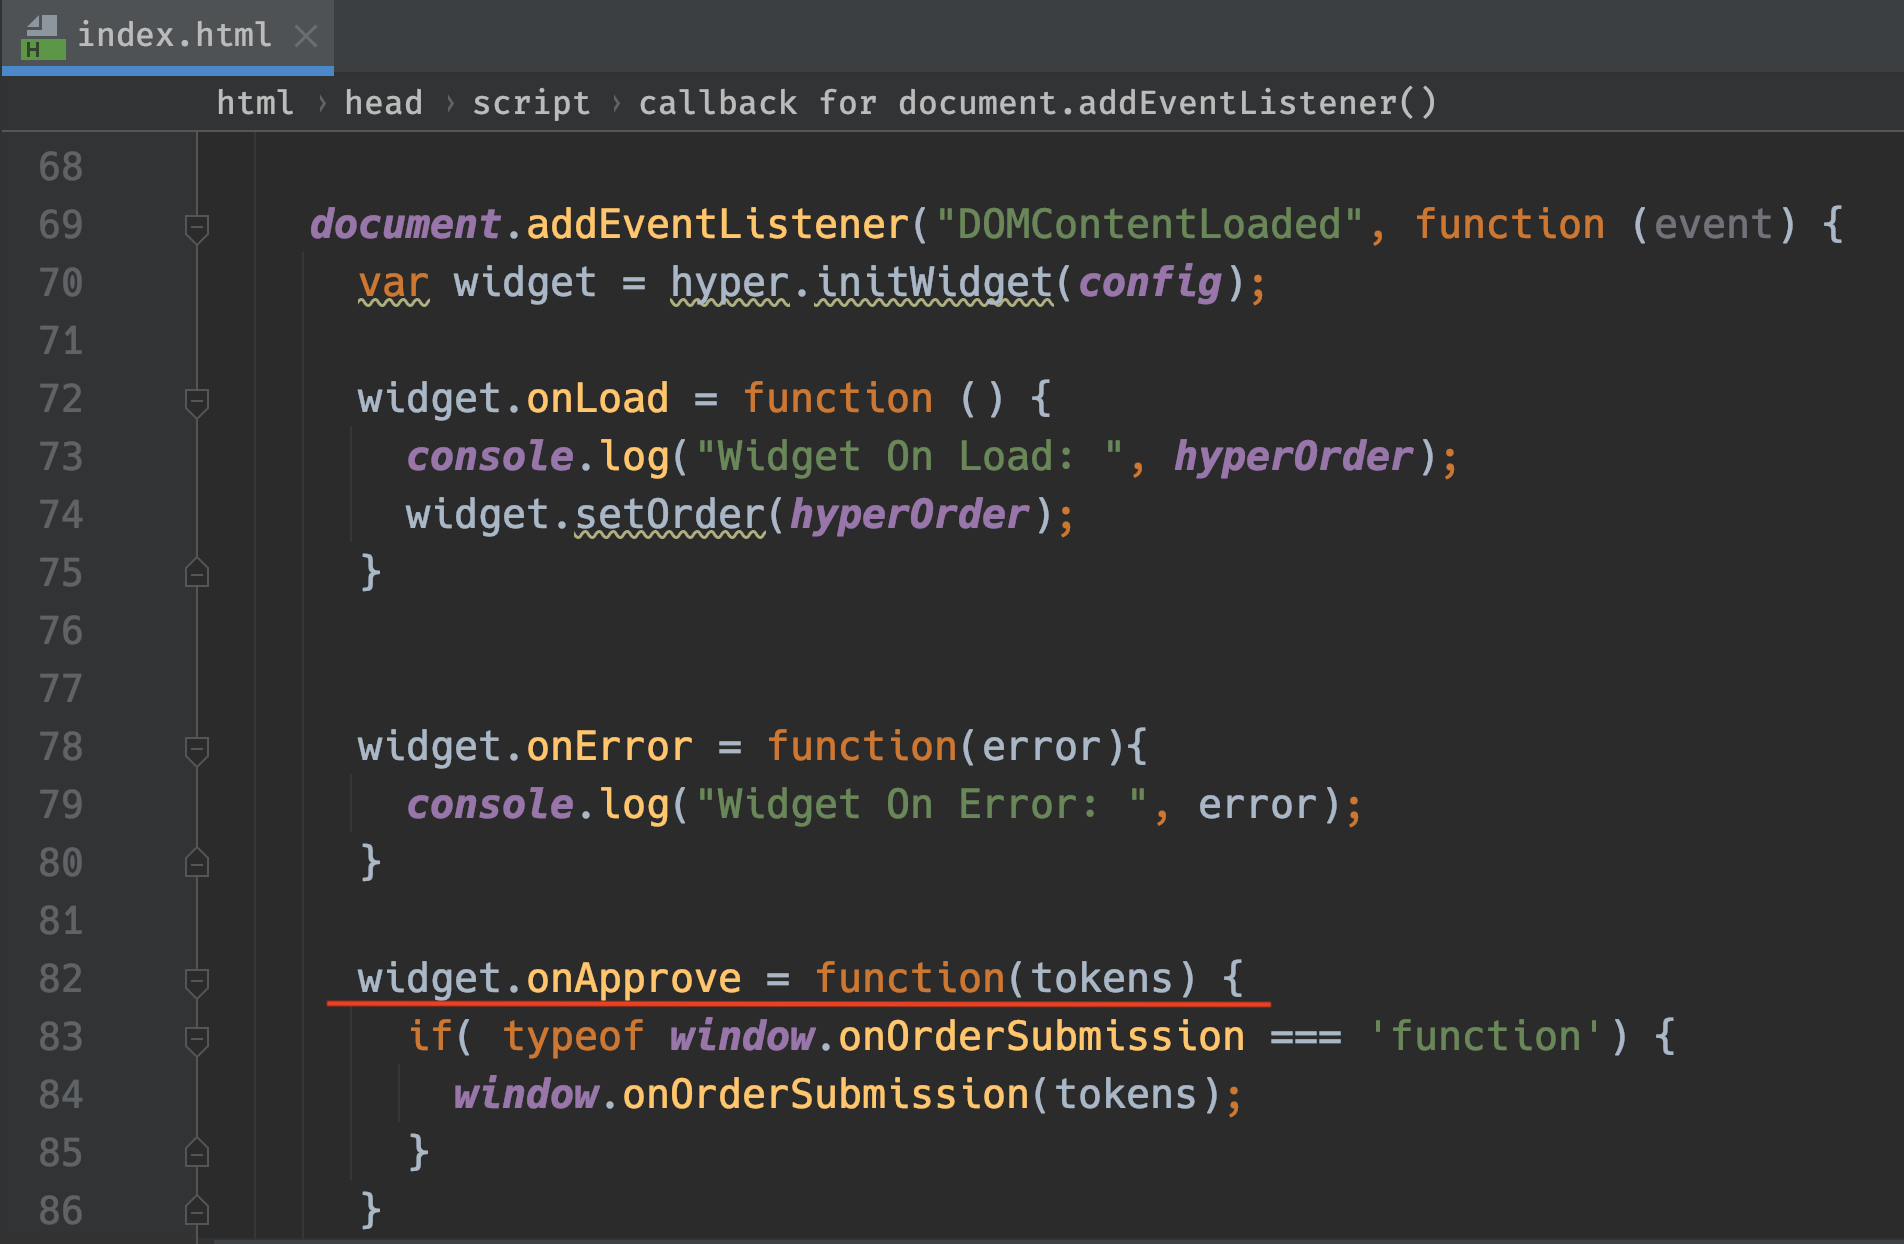
7: Customise success handler
- Edit
index.htmlfile and modifyonApprovehandler with custom logic to complete checkout process
8: Publish
- Publish the template to your site by uploading the entire React project