2. Collect Card Details
In this Article:
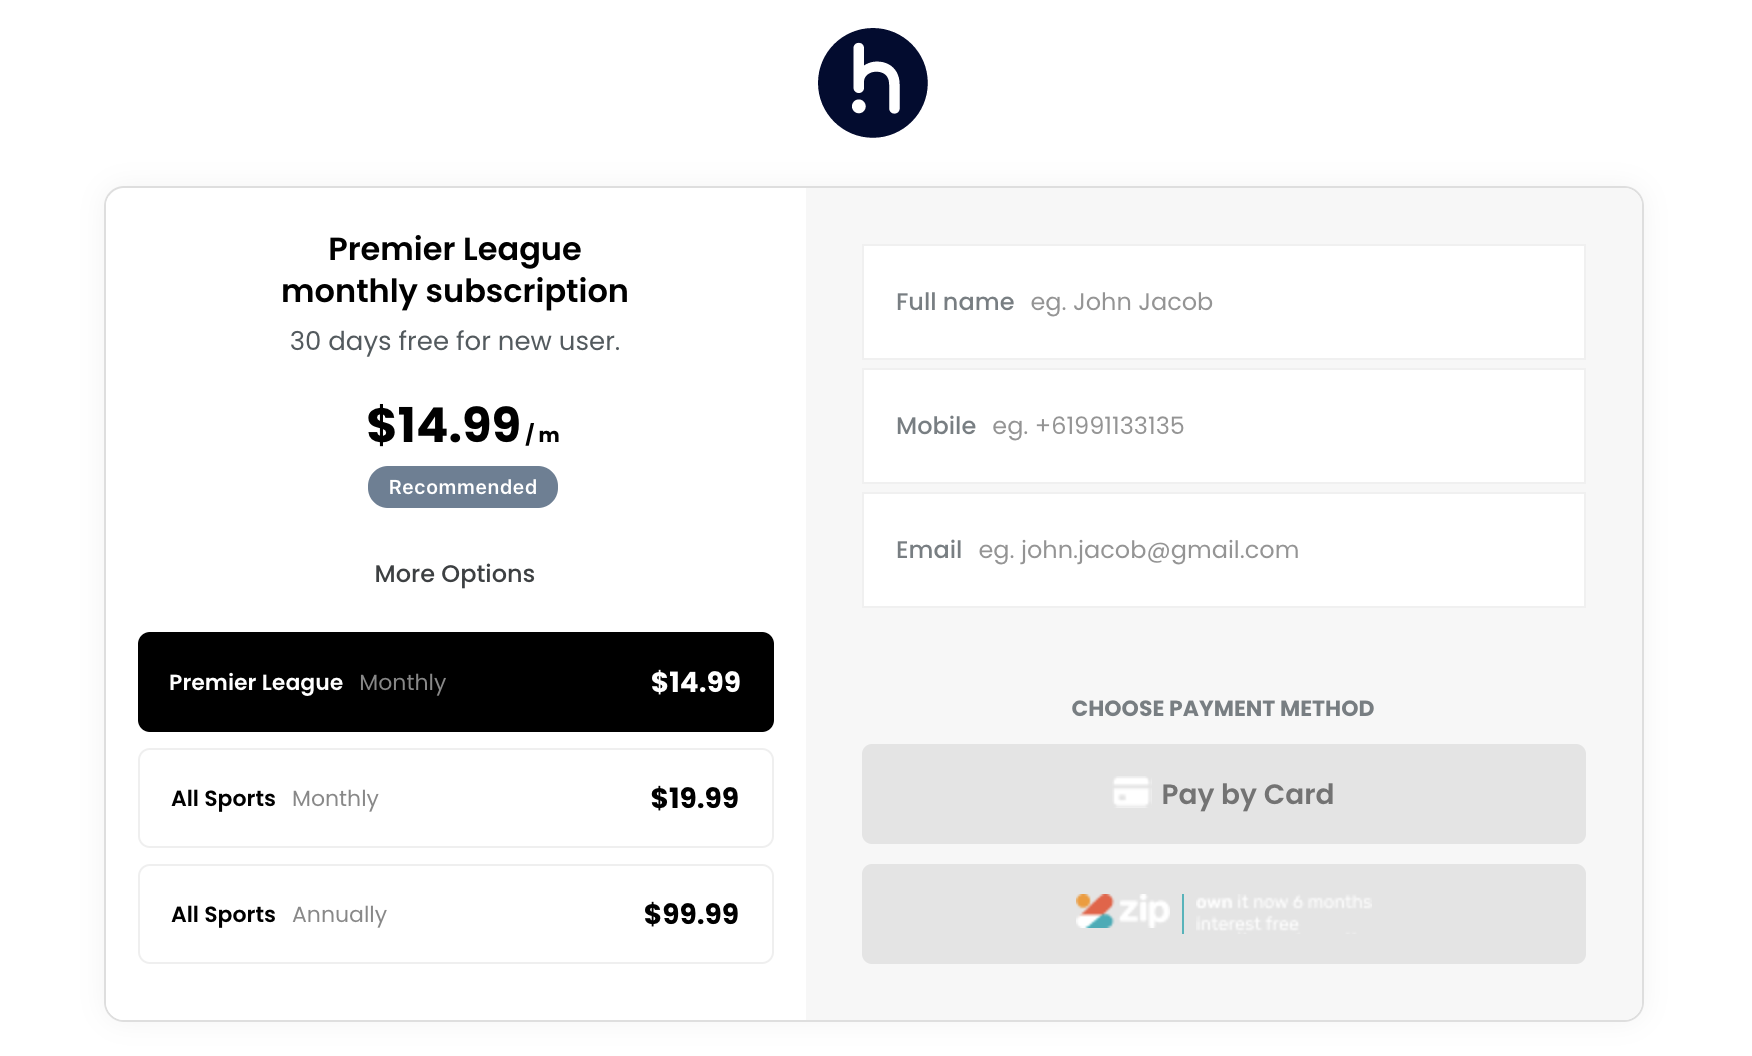
1: Download Template
- Download Hyper’s checkout page template and follow these instructions to customize it for your use case
2: Embed Hyper Widget
If you are embedding Hyper on an existing page then add the following code to the <HEAD> tag, replacing the publicKey and gatewayId values.
You will find these values by logging into your Hyper Merchant Portal and navigating to the “Developers” > “Keys” menu.
Example Embed Code
<script src="https://cdn.hyperid.co/widget/v1/main.js"></script>
<script>
    //configure Hyper widget
    var hyperGateways = [
      {type:"card",gatewayId:"<your-gateway-id>"},
      {type:"zipPay",gatewayId:"<zipPay-gateway-id>"},
      {type:"stripeGP",gatewayId:"<googlepay-gateway-id>"},
      {type:"stripeAP",gatewayId:"<applepay-gateway-id>"},
    ]

    //read your cart and set order details
    var hyperOrder = {
      "amount": 10.00,
      "currency":"AUD",
      "reference": "Q-12345",
      "items": [{
        "name":"ACME Toolbox",
        "amount": 8.00,
        "quantity": 1,
        "reference":"Red in color"
      },
      {
        "name":"ACME Bits",
        "amount": 2.00,
        "quantity": 1,
        "reference":"Fits into the toolbox"
      }]
    }

    var hyperConfig = {
      //remove useSandbox declaration for production
      publicKey:"<hyper-public-key>",
      useSandbox: true,
      gateways: hyperGateways,
    };


    //customize Hyper widget
    document.addEventListener("DOMContentLoaded", function (event) {
      var widget = hyper.initWidget(hyperConfig);

      widget.onLoad = function() {
        //set order details
        widget.setOrder(hyperOrder)
      }

      widget.onApprove = function(res) {
        //replace this with code to handle successful pay authroization
        console.log('Response:', res);
      };

      //when an unrecoverable error occurs
      widget.onError = function(err) {
        //cutomize this section to take recovery action
        console.log('Error occurred:', err);
      };

      //if a valid user profile is available, it can be used to optimize the checkout experience
      widget.onValidPreference = function(data) {
        //select the preferred product from the card
        console.log('Preferred SKU:', data.sku);
      };
    });

</script>
Refer to Hyper’s Widget API for method and parameter details.
Set useSandbox flag to true during development. Set gatewayId to determine the payment gateway to route payments from this page.
3: Add Hyper Widget placeholder
Finally, add a hyper-widget attribute to the HTML element where you would like to show the Hyper widget.
Example HTML Code:
<div id="hyper-widget"></div>
4: Customise styling
- The hyper-widget
<div>tag is a container to the hyper-widget - Thus, you can customize the width and length of this container using
cssand the widget will attempt to adjust itself inside it - It’s recommended that you place the widget next to the product carousel on your checkout page
For further information on any of the above, refer to the detailed API reference or contact Hyper support using the chat feature in the Hyper Merchant Portal.
5: Transact
Once the customer agrees to finalize payment, you will receive a callback from Hyper’s
onApprovehandler (see example above)The
datapassed by the handler will contain a vaultToken reference that must be used by your Checkout back-end to complete the transactionRefer to payment instructions on using the vaultToken to complete the transaction